
The Expedition Wherry Hull is Formed

Big changes since my last post... the hull of the Expedition Wherry is now wired together and the epoxying has begun. 


I'm doing things a bit differently from the manual, or at least I'm adding some things that the manual doesn't mention. So if you're following along and mine looks different than what the manual shows, you'll know why. 

Since my last post I have scarfed the sheer clamps together and then epoxied them to the #3 panels at the sheer line. I think I used around 80 clamps! 


The manual suggests that you overlap the transom ends and then later cut the sheer clamps short, but if you read further in the manual it mentions that you can do that now. I did it now and found that it worked better. I drew a line and used my pull saw to cut the ends. 


Then I set up the frames that the hull would be sitting on while the stitching was going on. I snapped a chalk line down the center of my table. Then I drew lines perpendicularly down from the centers of the frames. Finally, I mounted the frames on the center line. 


Then I wired on the panels. Here's how it looks after several hours of wiring. 

This was after the first two panels were added. 


Then I added the #3 panels with the sheer clamps. The transom went on much easier than I expected.

I had to drill holes into the sides of the transom doubler to hold the tops in.

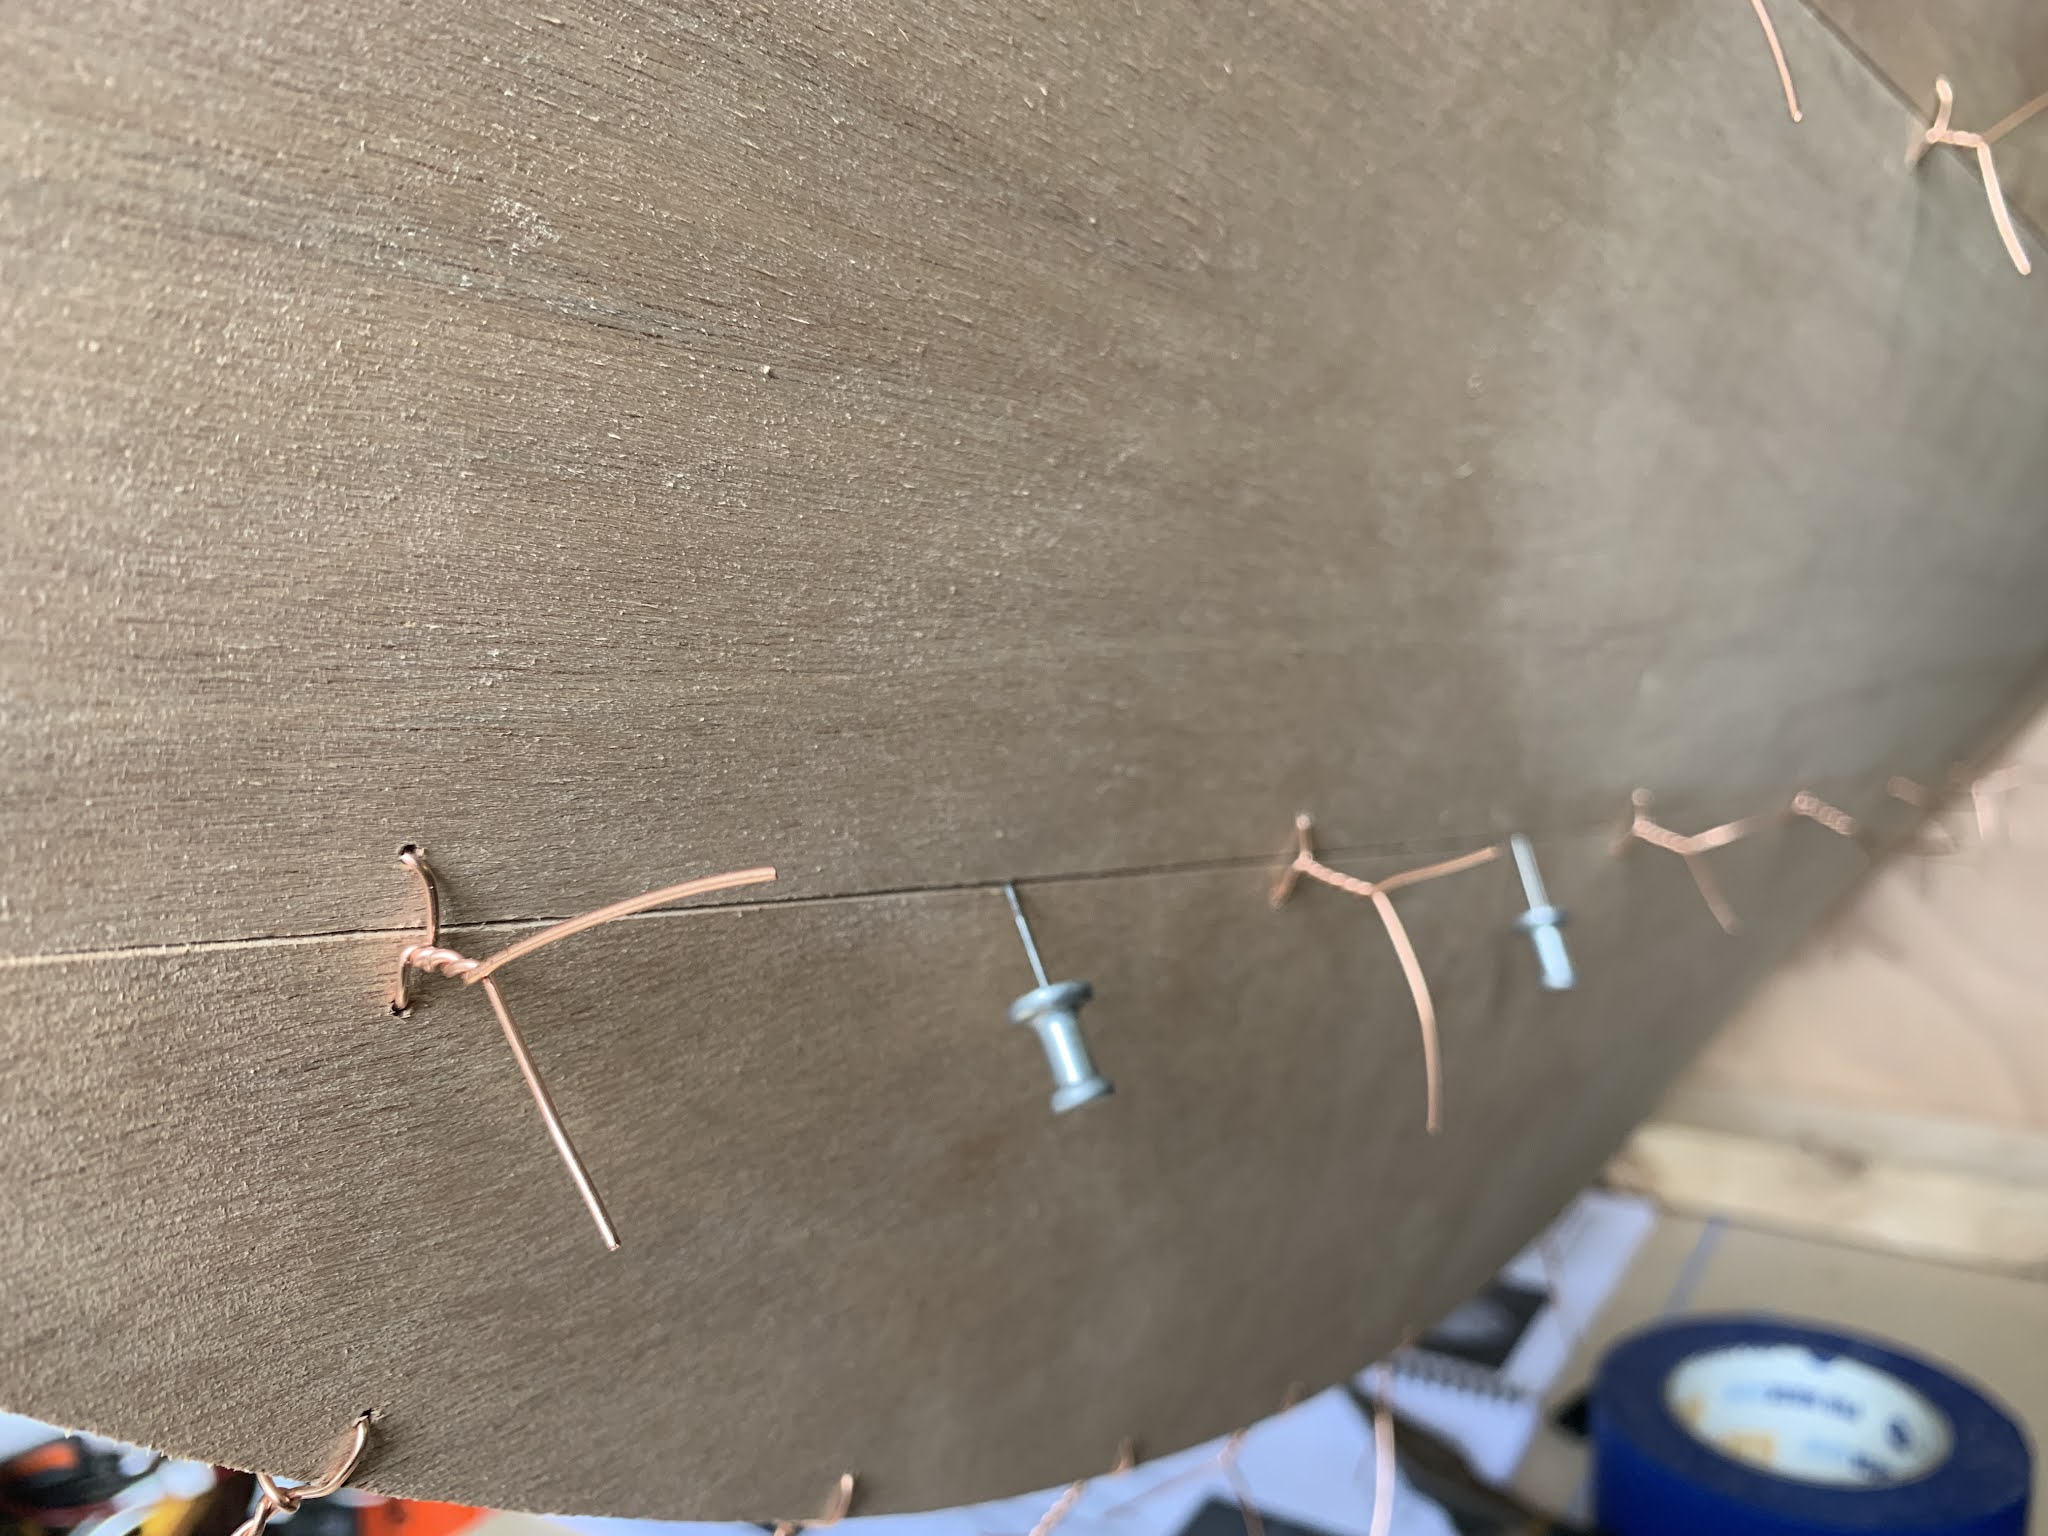
One thing I'm a bit surprised about in the manual is the lack of specific ideas and steps on certain things. I already mentioned that CLC doesn't really give very detailed instructions on fiberglassing (more on that in future posts too). But here's an idea that is commonly used in other stitch and glue boats, and that is to use large push-pins to hold panels flush to each other. 

If a panel just won't stay flush, you simply move the panel out or in and then push a push-pin into the edge of the panel to hold it either out or in. In the picture below, it looks like the pin isn't doing much, but if I pulled it out, the bottom panel would pop out further than the #2 panel. Cool idea, huh?! Why doesn't CLC mention that for their first-time builders?

CLC also suggests that you mix up a large batch of thickened epoxy and add huge fillets along all the seams. I'm only doing just enough to hold the hull together. Then tomorrow I will flip the boat over and run epoxy along the outside seams. This will hold the entire hull together and I won't have the thickened epoxy seams to look at. Structurally, it shouldn't be an issue because it will really be the 6 oz. fiberglass cloth inside and out that really holds the panels together. And this will look much nicer!


More later!


Aloha! 


Comments

Popular posts from this blog

The Rogue Manual

I've posted about this earlier, but thought it might be good to post it again for anyone who may be interested. I've started to write a manual of tips and tricks for Pygmy solo kayak builders. It covers the taping method, so that your boat doesn't have hundreds of holes all over it. I'm on version 2 now. Version 2 covers several other tips and tricks from myself and from others as collected over time. ATTENTION : Use the manual at your own risk! The only person responsible for any mistakes or problems with the building of your boat is you. Always use the official Pygmy manual that came with your kit. Only do those tips and tricks that make sense to you. If something in the manual doesn't sound right to you, then don't do it! Neither I, nor Pygmy Boats, nor anyone else except YOU is responsible for the safety of your boat and the quality of your build. It's in very rough draft form right now, but if you'd like to read it, please send a $10 donat...

Annapolis Wherry Spacered Inwales Installed

For the past week (yes, WEEK!) I have been working on the outwales and spacered inwales. The inwales and outwales are such an obvious part of the boat that you really want them to look as good as you can possibly make them. And doing that takes a lot of time and patience.  The spacered inwale kit is an addition to the basic wherry kit. The kit includes the OUTwales, but does not come with INwales. We like the look of the spacered inwales and find that they have some function too for securing things to the hull. They look nautical.    The spacered inwale kit comes with inwale rails, sticks you cut to make the spacers, a replacement breasthook for the bow, and replacement quarter knees for the transom.  They leave it up to you for how long to cut the spacers and how far apart to space them. The manual that comes with the kit is extensive.  I like the look of rounded spaces. No, it's not the normal look of spacers which are supposed to simulate the ribs on a wooden...

Outwales, Inwales, and Dyed Seats on Annapolis Wherry

For the past few days I have been tinkering on the outwales, spacered inwales, and the seats/thwarts.  At the Port Townsend Wooden Boat Festival this year, I saw another Annapolis Wherry that had a lovely bow treatment along the outwales at the bow. Instead of ending the outwales near the bow, this builder brought the inwales all the way around the bow. I'm trying to do the same thing, although I think that other builder is a better woodworker than I am, based on how it looks so far!  I used screws to temporarily hold the assembly in place while the epoxy cures. They have now been removed.  The assembly is made up of cutoffs from the inwales and outwales. I screwed up on one side but luckily had enough cutoffs to make another one. The center accent strip is Alaskan yellow cedar. It will look a lot better once it has been shaped. I'll do that after all the inwales and outwales have been installed.  I've also now epoxied on the first two outwales, one on port and one o...