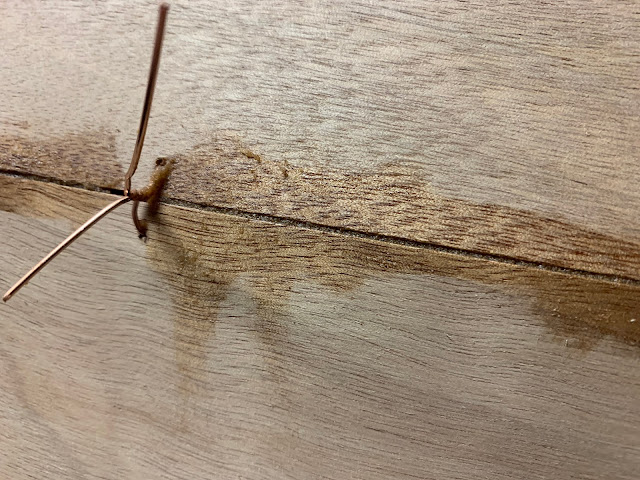
Expedition Wherry Wires Pulled and Ready for Sanding

 Just a quick update... I was able to pull the wires from the CLC Expedition Wherry. 

The wires that held the panels together came out easily. Just snip the inside bit and pull from the outside and they will come right out. 

The wires on the transom, bow, and bulkheads though were harder to pull. The bulkhead wires eventually came out with some persuasion. I found that I had to snip both sides of the bulkhead wires and then pull out the two outside wires separately and then the inside bit that ran through the bulkhead. Wasn't too bad but took time. 

I started with the transom though and wish now that I had learned a trick that I would figure on on the bow. I ended up leaving some wires in the transom. They will not be seen, but I now know that I could have easily gotten them out. 

NEAT WIRE PULLING TRICK: IF you have a wire that is stuck in hardened epoxy, you can usually get it out by doing this. 1) Snip the wire on the outside close to the hull be leave an 1/8th of an inch or so on both sides. 2) Hold a soldering iron/gun onto the end of the snipped wire for just a few seconds until the heat is transferred through the wire and softens the epoxy. 3) Easily pull the wire with some pliers. TA DA!

Just don't burn the wood or hold the iron too long. You only want to soften the epoxy just around the outside of the wire enough to pull it and not to soften a large amount of epoxy. 

Here is how my outside seams looked before pulling the wires. 


 Here is a picture of the bow after pulling the wires using heat. You can see that in one hole I used just a touch too much heat and slightly scorched the hole. No big deal, it will sand out easily. But just be careful. The bow wires all came out nicely.

The next thing I did was to add thickened epoxy to the bow. The manual later says that you should sand the bow to make a nicely rounded front. I'm taking a trick from Pygmy Boats and using thickened epoxy here instead of showing the bare wood. It will be an added bit of protection as it's harder than wood. If it gets chipped it will be easier to repair than wood. And finally, it's easy to shape with a rasp and sandpaper. The epoxy tape will easily wrap around it. 

Note that in the pictures below the bow epoxy has only been added... it has not been shaped yet! It will look much nicer once it has cured and is shaped.


 More later,


Aloha!


Comments

Popular posts from this blog

The Rogue Manual

I've posted about this earlier, but thought it might be good to post it again for anyone who may be interested. I've started to write a manual of tips and tricks for Pygmy solo kayak builders. It covers the taping method, so that your boat doesn't have hundreds of holes all over it. I'm on version 2 now. Version 2 covers several other tips and tricks from myself and from others as collected over time. ATTENTION : Use the manual at your own risk! The only person responsible for any mistakes or problems with the building of your boat is you. Always use the official Pygmy manual that came with your kit. Only do those tips and tricks that make sense to you. If something in the manual doesn't sound right to you, then don't do it! Neither I, nor Pygmy Boats, nor anyone else except YOU is responsible for the safety of your boat and the quality of your build. It's in very rough draft form right now, but if you'd like to read it, please send a $10 donat...

Annapolis Wherry Spacered Inwales Installed

For the past week (yes, WEEK!) I have been working on the outwales and spacered inwales. The inwales and outwales are such an obvious part of the boat that you really want them to look as good as you can possibly make them. And doing that takes a lot of time and patience.  The spacered inwale kit is an addition to the basic wherry kit. The kit includes the OUTwales, but does not come with INwales. We like the look of the spacered inwales and find that they have some function too for securing things to the hull. They look nautical.    The spacered inwale kit comes with inwale rails, sticks you cut to make the spacers, a replacement breasthook for the bow, and replacement quarter knees for the transom.  They leave it up to you for how long to cut the spacers and how far apart to space them. The manual that comes with the kit is extensive.  I like the look of rounded spaces. No, it's not the normal look of spacers which are supposed to simulate the ribs on a wooden...

Outwales, Inwales, and Dyed Seats on Annapolis Wherry

For the past few days I have been tinkering on the outwales, spacered inwales, and the seats/thwarts.  At the Port Townsend Wooden Boat Festival this year, I saw another Annapolis Wherry that had a lovely bow treatment along the outwales at the bow. Instead of ending the outwales near the bow, this builder brought the inwales all the way around the bow. I'm trying to do the same thing, although I think that other builder is a better woodworker than I am, based on how it looks so far!  I used screws to temporarily hold the assembly in place while the epoxy cures. They have now been removed.  The assembly is made up of cutoffs from the inwales and outwales. I screwed up on one side but luckily had enough cutoffs to make another one. The center accent strip is Alaskan yellow cedar. It will look a lot better once it has been shaped. I'll do that after all the inwales and outwales have been installed.  I've also now epoxied on the first two outwales, one on port and one o...