Epoxying the inside of the CLC Expedition Wherry will take a much longer time than the outside did.
The inside is done in sections instead of the entire hull at one go. It's easier to do it in smaller sections like that, but is more tedious and time consuming.
CLC also wants you to run beads of thickened epoxy along all the hull
seams and bulkhead seams. I am not sure why they want you to run seams
along the hull panels, especially in the middle of the boat where the
panels and much closer to flat to each other. That type of seam will
have virtually no appreciable strength. I'm only running beads along
both sides of the bulkheads, and along the panels at the bow and stern
but only along the keel. Otherwise I'll leave it to the very strong
holding power of the fiberglass cloth on both the inside and outside.
For fiberglassing the inside, CLC suggests that you cut a specific sized rectangle for each of the inside bays. There are different measurements for each bay but the rectangles won't conform to the shape of the bays. Instead, I am making custom patterns for each bay out of newspaper. It's easy and only takes a few minutes to cut and tape together a pattern for you to use to cut the fiberglass.
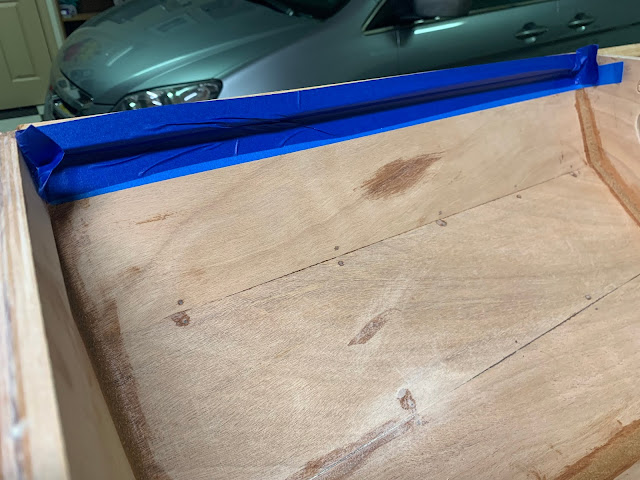
CLC also gives no advice on how far up the side to take the fiberglass. Do you run it up and under the sheer clamp and then up to the top? What do you do? So, I've decided that the structural benefit of taking the fiberglass the last inch right up to the sheer clamp is negligable, so I am doing a trick we learned from Pygmy Boats. It's the "Blue Tape Trick".
You run a piece or two of blue tape along the hull such that the tape is all ABOVE where you want the fiberglass to end. You then run the fiberglass slight overlapping the blue tape and you don't have to worry too much about the ends coming unravelled.
Then, after 3-5 hours, when the epoxy reaches the "green stage", you just lightly run a sharp knife along the bottom of the tape being sure not to cut into the actual tape. You're only cutting through the fiberglass and slightly into the wood below. Then simply pull the blue tape up and you'll be left with a clean fiberglass line.
Let it cure and give the sharp edge a quick sanding.
Here is how the pattern looked.
Ready to cut the fiberglass.
The custom fitted fiberglass cloth ready to be installed.
Set into the hull.
Then I poured in epoxy, spread it around with a spreader (NO ROLLERS... see my previous post on the uselessness of roller in wetting out fiberglass cloth), and then squeegeed the excess off with the same spreader but into a different cup.
In my previous post I mentioned that you should not use that air-filled excess epoxy on cloth, but there's really no reason not to use it to epoxy seal the bulkheads, so grab a foam brush or chip brush and paint it on the bulkheads. Be neat!
CLC says to add a second coat of epoxy. The only thing that will do is add weight. It will not add any more structural support. It may however add more abrasion resistance, so if you think you'll be really rough on your glass then add a second coat. I'm leaving my hidden bays with only one coat. Yes, you'll feel the weave but so what.
That's it for now.
Aloha!


Comments
Post a Comment