
One last step tonight before tomorrow's big glue job of epoxying the inside of the hull. Tonight I fitted the fiberglass into the hull and taped it to the sides.
ALTERNATIVE STEP FROM THE OFFICIAL PYGMY MANUAL: My biggest suggestion in this step that varies from the official Pygmy manual is buy an additional 18' or so of fiberglass cloth from Pygmy! The official manual has you use two overlapping scraps of cloth. It's just sorta cheap and could potentially leave you with an ugly area of overlapping but not perfectly flat glass. Rather, just spend a little bit of extra money and buy a run of fiberglass that will fit the entire inside. This will also leave you with an entire run to fiberglass the deck later on too. I'm not entirely sure why Pygmy decided to skimp in this one area, but it's never sat well with many builders.
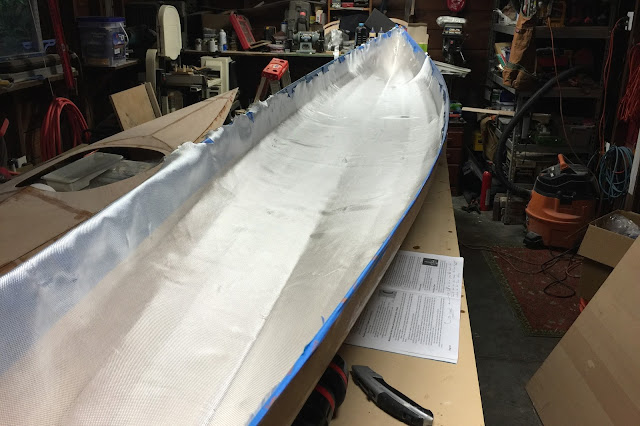
I laid my full run of cloth down the hull and ran one side along the tape. You then smooth it out as best you can and tape the edge every foot or so. The remainder can be cut from the opposite side. Then smooth out that other side and tape its edges too.
At the bow and stern you will have to make a cut or two to enable the cloth to lay smoothly.
This is what the hull looked like tonight, ready for tomorrow's epoxy job...
Here is the bow with an extra piece of cloth to cover the area where I had to cut the main piece. I goofed and ended up with an area that had no cloth at all. Oops. But this will work out just fine. Besides, once the deck is installed no one will ever see this far up the bow ever again, even when the hatches are installed later.


Here is the stern with the small piece of overlapping cloth. This is what the bow should have looked like but I screwed it up instead. Oh well... it's all easy to fix!

Wish me luck tomorrow during the epoxying of the inside! It's a bit tricky at times but by being careful and paying attention to runs it should look OK when done. Of course I'll post pictures!
Peace!
ALTERNATIVE STEP FROM THE OFFICIAL PYGMY MANUAL: My biggest suggestion in this step that varies from the official Pygmy manual is buy an additional 18' or so of fiberglass cloth from Pygmy! The official manual has you use two overlapping scraps of cloth. It's just sorta cheap and could potentially leave you with an ugly area of overlapping but not perfectly flat glass. Rather, just spend a little bit of extra money and buy a run of fiberglass that will fit the entire inside. This will also leave you with an entire run to fiberglass the deck later on too. I'm not entirely sure why Pygmy decided to skimp in this one area, but it's never sat well with many builders.
I laid my full run of cloth down the hull and ran one side along the tape. You then smooth it out as best you can and tape the edge every foot or so. The remainder can be cut from the opposite side. Then smooth out that other side and tape its edges too.
At the bow and stern you will have to make a cut or two to enable the cloth to lay smoothly.
This is what the hull looked like tonight, ready for tomorrow's epoxy job...

Here is the bow with an extra piece of cloth to cover the area where I had to cut the main piece. I goofed and ended up with an area that had no cloth at all. Oops. But this will work out just fine. Besides, once the deck is installed no one will ever see this far up the bow ever again, even when the hatches are installed later.


Here is the stern with the small piece of overlapping cloth. This is what the bow should have looked like but I screwed it up instead. Oh well... it's all easy to fix!

Wish me luck tomorrow during the epoxying of the inside! It's a bit tricky at times but by being careful and paying attention to runs it should look OK when done. Of course I'll post pictures!
Peace!
Comments
Post a Comment