
Big step today... was able to get the hull bottom fiberglassed. It's always a bit magical watching the white cloth turn to crystal clear as you spread on the epoxy.

I start in the middle and work toward one end, and then go back and work to the other end.
The Pygmy manual does a good job of describing how to fiberglass the hull. Read it and you should be fine.
Cut a piece of cloth to fit. Make sure you don't cut it toooo close. Leave at least two inches all around. Then use your hands and smooth the cloth all over the hull to help it conform to the hull shape.
The only area where you will need to cut the cloth is the stern. The bow though should pretty easily conform to the shape without cutting.
I was working by myself for the most part, so I used small batches. Two pumps resin & hardener at a time. Thoroughly mix and pour on. I don't use the rollers. Instead, I just use a yellow plastic spreader and gently spread it over an area.
I spread the epoxy on one side in the middle. Then I mixed up another two-pump batch and spread it over the opposite side. Then, I go back to the first side and use the yellow squeegee to gently scrape off the excess epoxy and then scrape it into a separate cup. DO NOT REUSE THE EXCESS EPOXY! It now has way too much air in it and will be cloudy.
Also be careful with the excess epoxy that builds up in the scrape-cup... it can get very hot if allowed to remain in the cup. So hot that it will melt the cup. When it starts to get full then just pour it over some cardboard or something to spread it out.
Here are some pics...
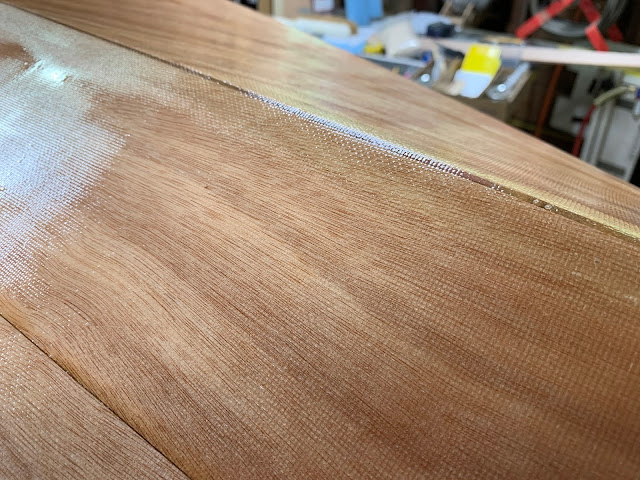
When properly squeegeed off, the cloth will look slightly dry and you'll be able to see the weave in the cloth. If you don't squeegee the excess, the cloth will simply float over the wood and be very uneven. You must squeegee! But don't push too hard... if the cloth starts to look white or too dry, then you're doing it too hard.


Don't worry too much about getting every drip and run. You'll be sanding it all later anyway. If you try to squeegee the runs when they've started to set up, you may get streaks instead. Just sand it later.
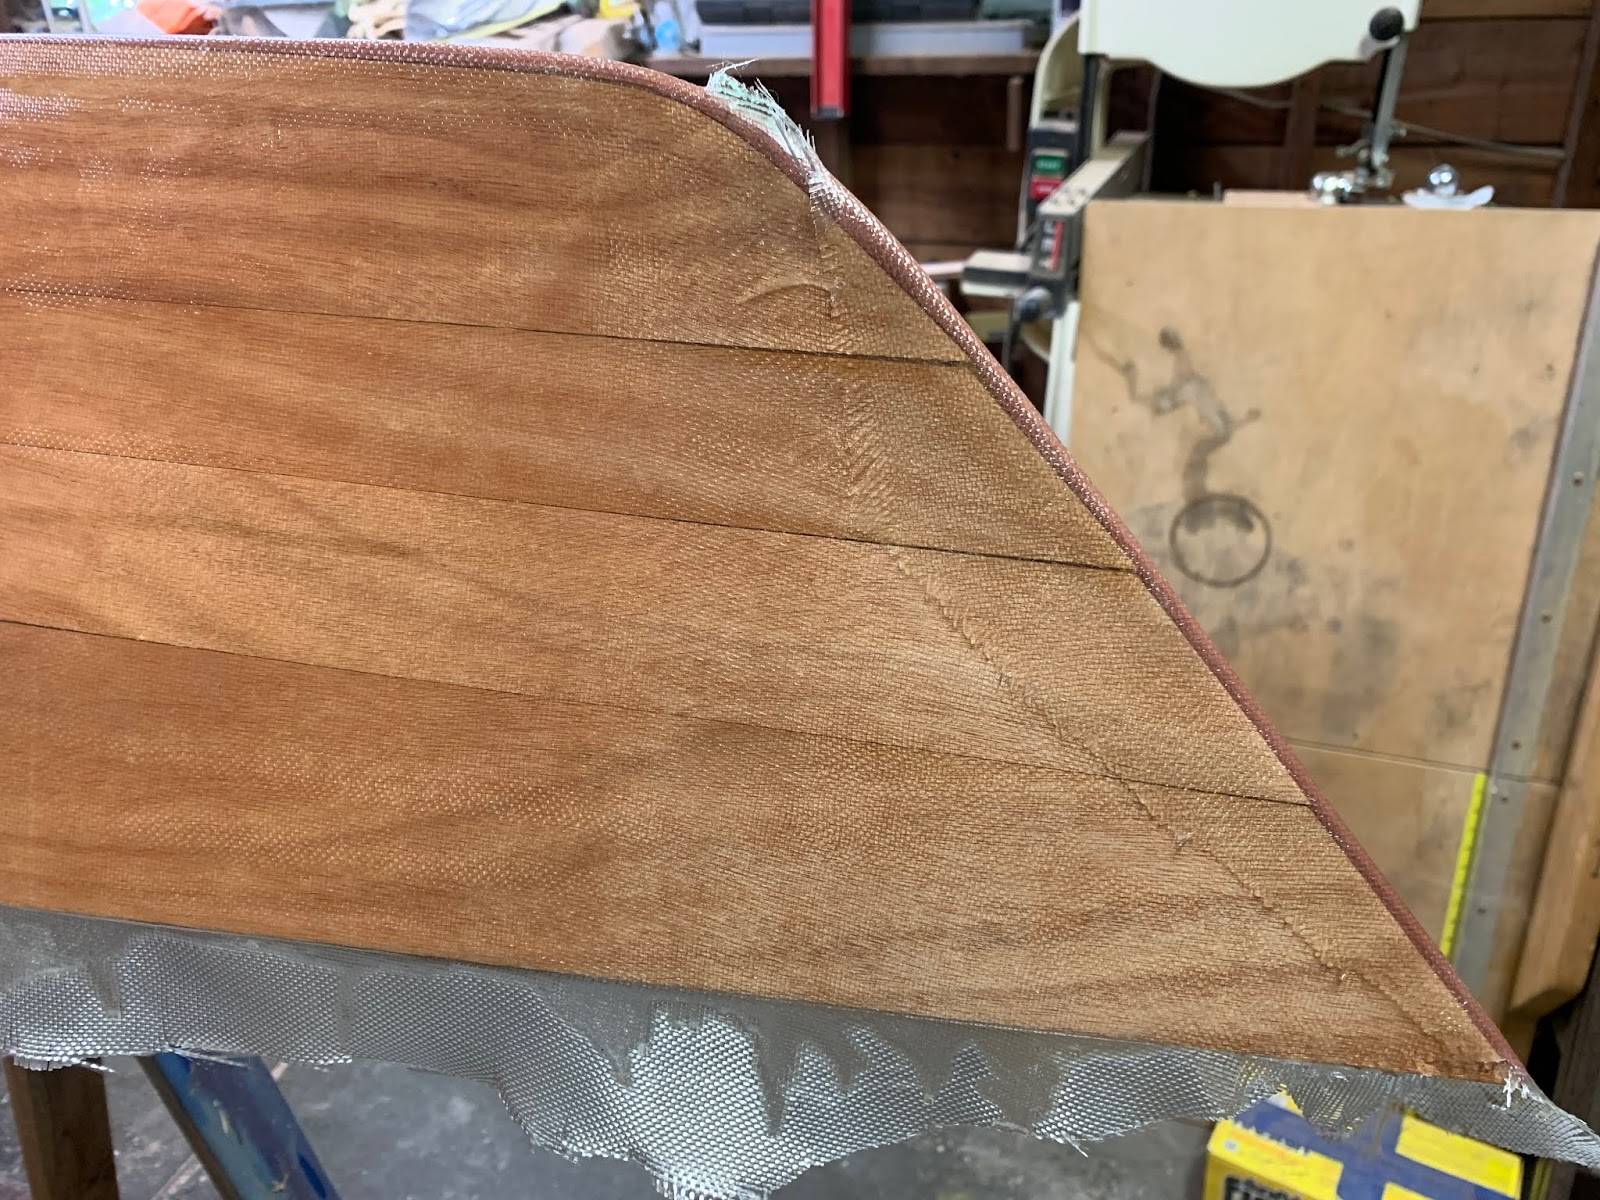
At the stern you'll need to cut the ends along the keel, then trim so that the two sides can overlap. One side will look perfect but the other side will show the overlap. Don't worry, you'll easily sand it flush later on. See the picture below... you can see the overlap from the other side now, but it will get sanded and you'll not be able to see it eventually.


Then I'll go back when the epoxy has reached the "green" stage and trim off the edge with a utility knife. Depending on temperature, it could be 3-8 hours or so. My garage is currently a bit chilly so I'll just check early tomorrow morning.
My one major mistake today... I forgot to epoxy the hull numbers UNDER the cloth!!! Ugh!!! Might have to just skip it this time. Drat...
More later!
Cheers!

I start in the middle and work toward one end, and then go back and work to the other end.
The Pygmy manual does a good job of describing how to fiberglass the hull. Read it and you should be fine.
Cut a piece of cloth to fit. Make sure you don't cut it toooo close. Leave at least two inches all around. Then use your hands and smooth the cloth all over the hull to help it conform to the hull shape.
The only area where you will need to cut the cloth is the stern. The bow though should pretty easily conform to the shape without cutting.
I was working by myself for the most part, so I used small batches. Two pumps resin & hardener at a time. Thoroughly mix and pour on. I don't use the rollers. Instead, I just use a yellow plastic spreader and gently spread it over an area.
I spread the epoxy on one side in the middle. Then I mixed up another two-pump batch and spread it over the opposite side. Then, I go back to the first side and use the yellow squeegee to gently scrape off the excess epoxy and then scrape it into a separate cup. DO NOT REUSE THE EXCESS EPOXY! It now has way too much air in it and will be cloudy.
Also be careful with the excess epoxy that builds up in the scrape-cup... it can get very hot if allowed to remain in the cup. So hot that it will melt the cup. When it starts to get full then just pour it over some cardboard or something to spread it out.
Here are some pics...
When properly squeegeed off, the cloth will look slightly dry and you'll be able to see the weave in the cloth. If you don't squeegee the excess, the cloth will simply float over the wood and be very uneven. You must squeegee! But don't push too hard... if the cloth starts to look white or too dry, then you're doing it too hard.


Don't worry too much about getting every drip and run. You'll be sanding it all later anyway. If you try to squeegee the runs when they've started to set up, you may get streaks instead. Just sand it later.
At the stern you'll need to cut the ends along the keel, then trim so that the two sides can overlap. One side will look perfect but the other side will show the overlap. Don't worry, you'll easily sand it flush later on. See the picture below... you can see the overlap from the other side now, but it will get sanded and you'll not be able to see it eventually.


Then I'll go back when the epoxy has reached the "green" stage and trim off the edge with a utility knife. Depending on temperature, it could be 3-8 hours or so. My garage is currently a bit chilly so I'll just check early tomorrow morning.
My one major mistake today... I forgot to epoxy the hull numbers UNDER the cloth!!! Ugh!!! Might have to just skip it this time. Drat...
More later!
Cheers!
Comments
Post a Comment