
Started the last major step tonight... varnishing the hull!
I started by cleaning the garage and dismantling the table. Once cleaned up I pulled out my rope stands instead. They are lower too so I can more easily see what I'm doing.
Varnishing Tips for Wood Kayaks with Fiberglass Coatings:


I started by cleaning the garage and dismantling the table. Once cleaned up I pulled out my rope stands instead. They are lower too so I can more easily see what I'm doing.
Varnishing Tips for Wood Kayaks with Fiberglass Coatings:
Varnishing has always been a bit of a black art, but there
is a simple, straightforward technique that works for many builders. It’s
actually very simple and does not involve thinning the varnish. If you’re
making fine furniture then you may want to do more steps, but for kayaks that
will be used and will need to be re-varnished every 4-5 years anyway, this
technique does a surprisingly good job.
Do these steps on the hull first (boat upside down) and
build up as many coats as you want (usually at least three). Then let it cure
for a day or three, and then roll the boat over and repeat all these steps for
the deck.
- Use high quality Z-Spar Flagship varnish from Pettit. Stir it gently but well. Never shake the varnish can.
- This is the step that
will make the old varnish guys down at the yard cringe, but it works
regardless! They would never use a roller… “Makes too many air bubbles!” they’d
say. Yes, it does, but that’s why you follow it with a foam brush in the next
step.
Using a small (4") white foam roller, spread on a THIN (VERY THIN) coat of varnish in a very small area (2' x 2' or less). So thin that you’ll feel you’re skimping on the varnish, but at the same time make sure everything in your area is wet. The brushing in the next step only breaks the bubbles but doesn’t spread it too much so it’s important that you roll it on evenly.

- Then use a black foam brush to tip the air bubbles out of the varnish and to
smooth the coat. Brush from dry into wet areas. Make nice, long strokes all the
way through the area you just rolled and a bit onto the previous area you
varnished. Watch for any runs and clean them up with the brush, but if you made
a thin enough layer with the roller then it shouldn't be an issue.
- Don’t race, but work efficiently so that the previous area doesn’t start to
skin over or you’ll leave brush strokes. Working at a normal, efficient pace
will allow the strokes to all flatten out and blend with each other creating a
very nice surface. Over the next several minutes the brush strokes should even
out and blend together into a nice, smooth surface.
- Repeat in small patches (2' square or so) working down the hull until the entire hull
is varnished. Leave the work area closed for at least 4 hours to prevent
kicking up too much dust. Don't be obsessive about it, but do be prudent.
- The next day lightly sand with 220-320 black sandpaper
(wet-dry, silicon carbide) and wipe off clean. After your first coat you may
find some bumps and such. Just sand them flat. Later coats seem to be smoother.
NOTE: You’ll need a new roller and a new foam brush for each coat. There is no way to adequately clean the foam. Just spend a few extra dollars and have enough rollers and brushes on hand. Keep them sealed in a rolled up bag so sanding dust doesn’t get on them.
- Repeat steps 1 – 5 to build up at least 3 coats; 6 are better if you want a really deep, shiny varnish.
- When you’ve built up enough coats to your satisfaction then let the varnish dry for at least a couple days before you roll it over.
- Roll the boat over and repeat the entire process for the deck!

It's that easy. Many make the mistake of brushing on too
thick a coat of varnish. It will always have sags and runs. This process of
using the rollers to apply super thin
coats works really well.
Do not thin the varnish for any of the coats. A lot of
people do but if you roll on a thin enough coat you won’t need to. The
instructions on the can say that thinning shouldn't be needed. For most
purposes this works perfectly.


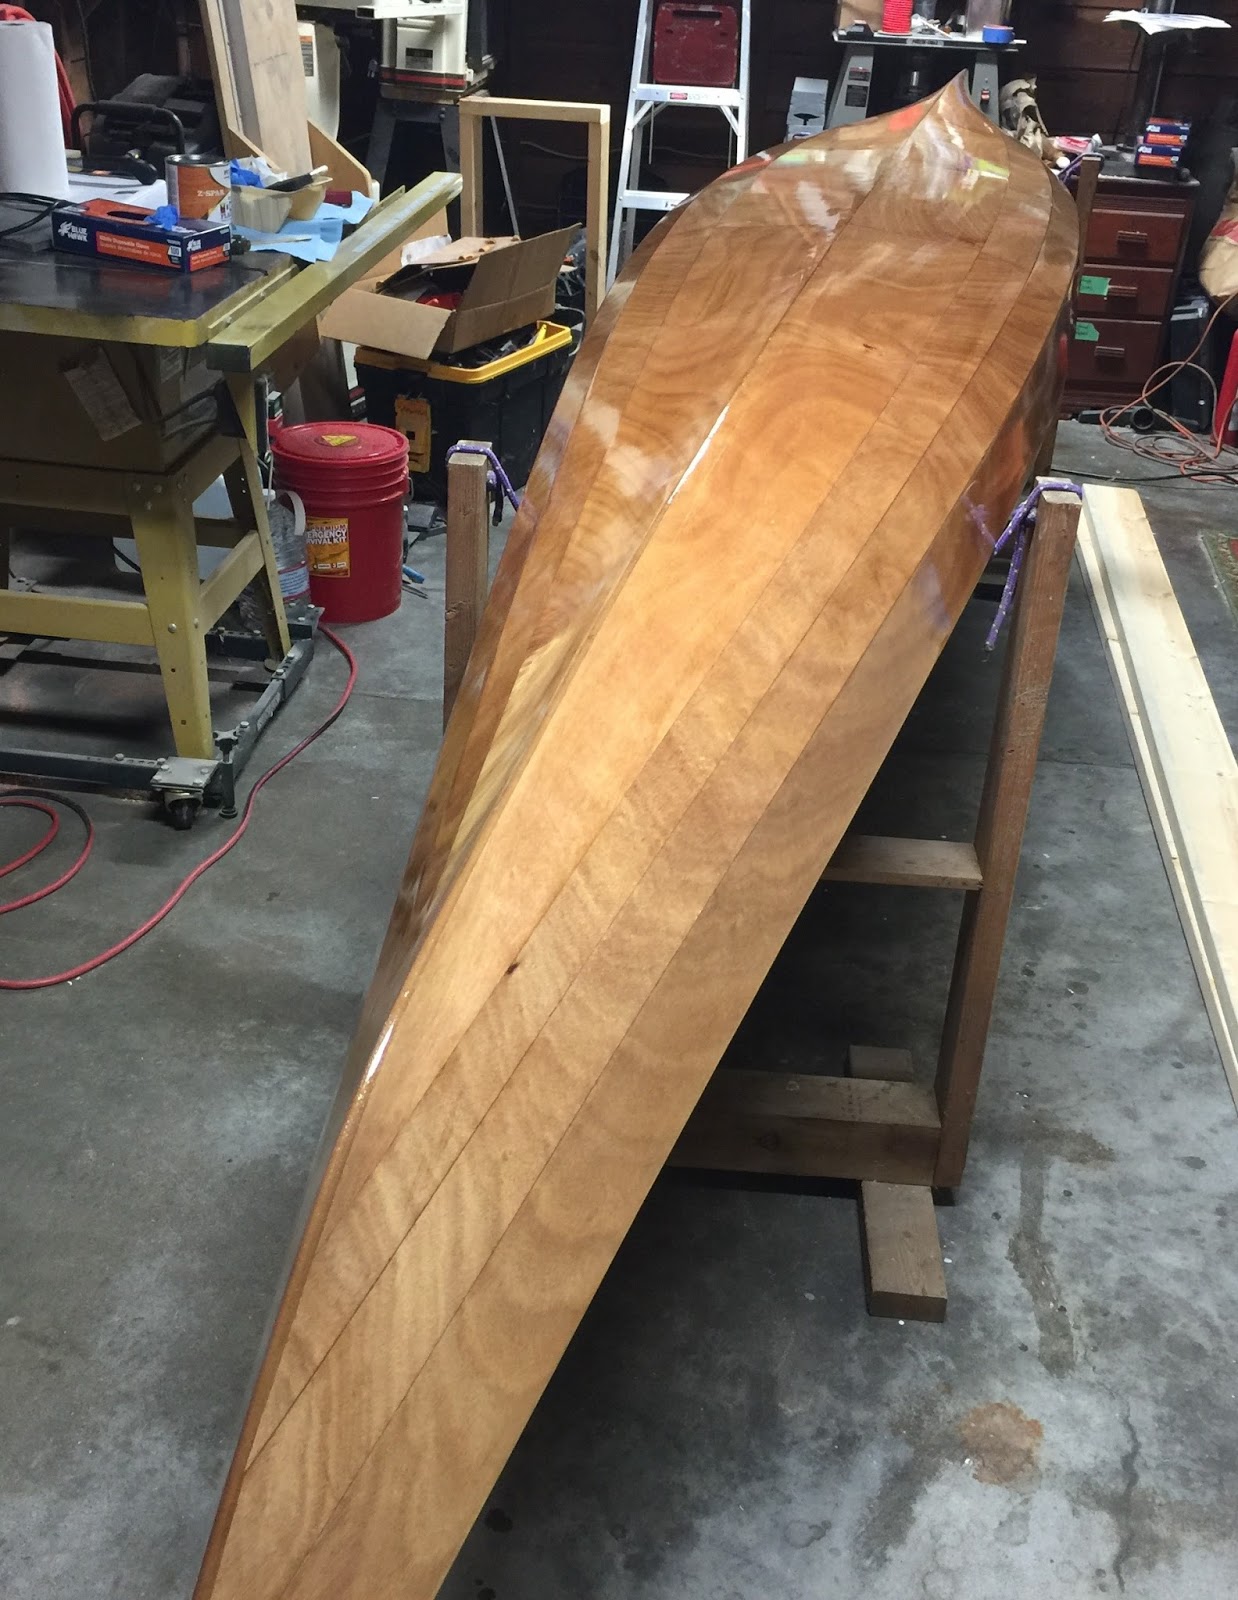
That's how she looks after the first coat. I hope to put 3-4 coats on the bottom and 5-6 on the deck.
Aloha!
Comments
Post a Comment